One fantastic way to see attack techniques is by capturing your attack of a vulnerable image in a Spydertrace.
If you are not familiar with vulnhub.com, it is a site dedicated to providing “materials that allow anyone to gain practical ‘hands-on’ experience in digital security, computer software & network administration.” Vulnhub.com provides a library of vulnerable images to practice exploits and red-team attack techniques.
Step 1: Create your attack environment
To set up images from vulnhub.com and create a safe environment for attacking these images, we suggest using Oracle’s VirtualBox
Download/install Virtual Box here https://www.virtualbox.org/wiki/Downloads
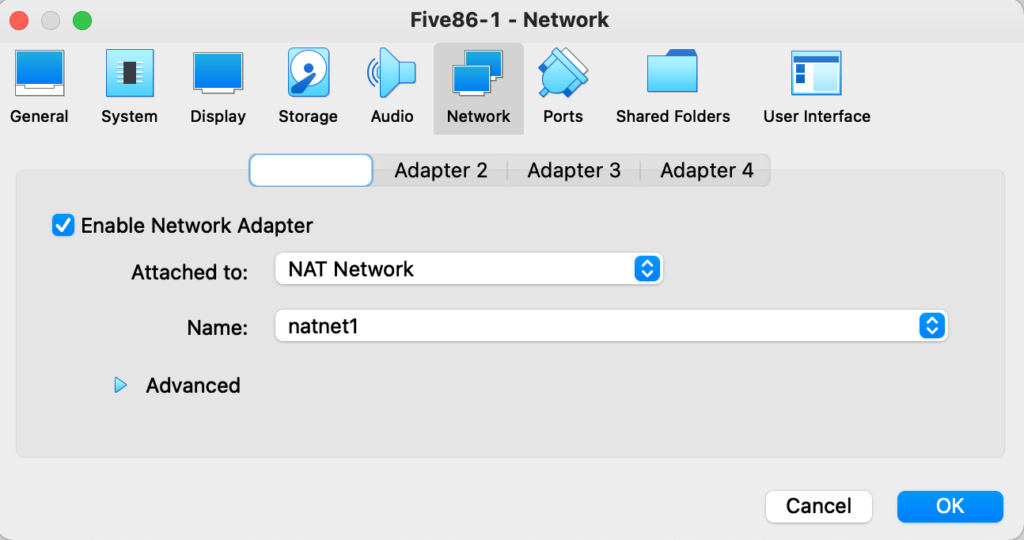
Since we will attack the vulnerable image with real attack techniques/exploits, we suggest creating a separate environment. In Virtualbox, we did this by created a “NAT Network”.
After installing Oracle’s VirtuaBox, type on the command line:
VBoxManage natnetwork add --netname natnet1 --network "192.168.15.0/24" --enable --dhcp on
This command both creates a NAT’d Network called “natnet1” and creates a DHCP server in virtualbox using the 192.168.15.0/24 subnet.
Step 2: Setup your Attack Machine
We need to attack our vulnhub image from a different system within our NAT Network. We recommend setting up a new instance of Kali Linux.
https://www.kali.org/get-kali/#kali-virtual-machines
1) Import this VM into Virtual Box
2) Under Settings, change the Network Adapter to attach to “NAT Network” with the name “natnet1”

3) We recommend disabling USB ports and audio on the VM in Virtual Box settings.
4) Start the machine with “Normal Start”, the default login is “kali/kali”.
Step 3: Setup a Personal Firewall
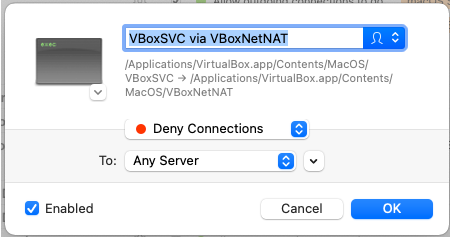
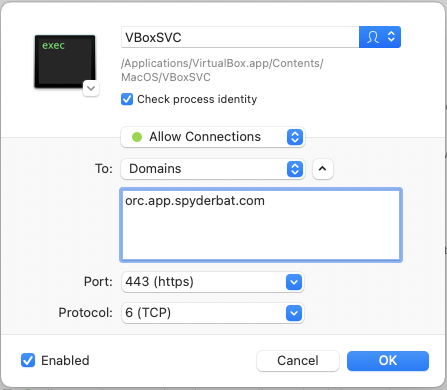
For safety, we want the victim VM to be able to contact the Spyderbat “Orc” but not anything else. Setting this up on a Powerbook, we found Apple’s personal firewall was not sufficient. So we recommend a firewall called “Little Snitch” and configured 2 rules:
Rule 1: Deny everything outbound from VirtualBox

Rule 2: Allow traffic on TCP port 443 from Spyderbat – orc.app.spyderbat.com

Step 4: Choose a vulnhub image for your Victim Machine
Go to the vulnhub five86-1 https://www.vulnhub.com/entry/five86-1,417/
Note – you can elect to find a different vulnhub image by using vulnhub.com’s search and typing “Linux”. While most options will have a VirtualBox image, not all will so you may need to change the image installation process.
Step 5: Install Spyderbat’s Nano Agent on the Victim Machine
Before we get going, we want to capture everything we do to the victim machine. This means we need to get on the machine in single-user mode to install our nanoagent. To boot into single-user mode (on most Linux distributions):
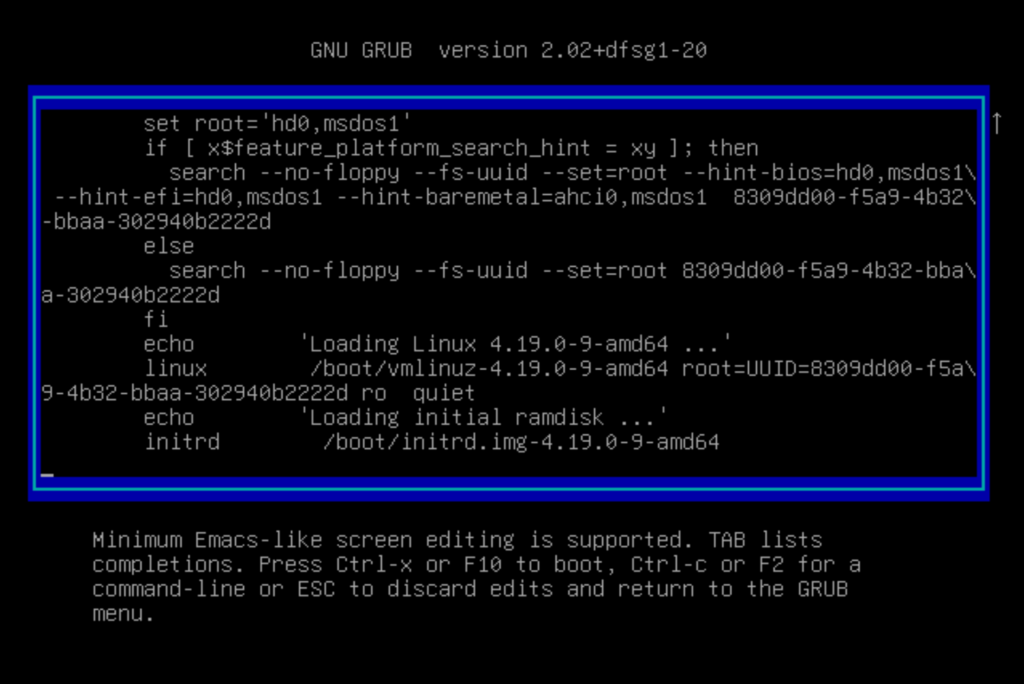
1) During the Linux boot process, type ‘e’ to edit the boot loader.

2) Replace “ro quiet” with “rw init=/bin/bash” to temporarily boot into a writable shell (known as single-user mode)
3) Press “ctrl-x” to proceed with the boot.
You should now be in a shell as root. This is a limited shell. To install the Nano Agent, we are going to create a new user, reboot, login as our new user, and install the agent.
4) Type on the command-line:
adduser <username>
usermod -aG sudo <username>
5) Reboot the machine and login as your new user.
6) On a separate machine, use a browser to login into your Spyderbat Community Edition account.
7) When prompted, select “Begin Tracing” and follow the instructions to install Spyderbat’s Nano Agent onto the victim machine. See Spyderbat Blog: How to Install Spyderbat’s Nano Agent
Note – there are a few vulnhub images that have removed the ability to boot into single-user mode. In this case, you may have to get root on the box by going through the attack exercises, installing the Nano Agent once you have rooted the box, then repeating the attack exercises to capture it with Spyderbat.
Once your Nano Agent is installed, try gaining access to the vulnerable image and then seeing your results in Spyderbat.
See examples of an attack trace using vulnhub images in Spyderbat’s Defend the Flag Linux Challenges. Sign up here: https://app.spyderbat.com/signup
Thanks and happy tracing!
Write a comment